It’s LIVE!!!

Christensen Creations has several patterns to use fabric yoyos on quilts, wall hangings, hot pads and clothing. Link to a blog with full instructions.

WHAT is live? My guest blog for MadameSew.com on how to make yoyos to embellish clothing and quilts is now “live,” meaning posted!

This one includes specific step-by-step directions and about 20 photos. Click the link to go read it:

https://madamsew.com/blogs/sewing-blog/embellish-a-quilt-with-fabric-yoyos-madam-sew

In honor of my collaboration with Madame Sew, I’ve put all my yoyo patterns on sale. Try one!!

Happy to Gladiolus Platter Pad #CC2012

Glad Not Nana’s Yoyos wall hanging #CC 2100

“Glad to Have Scraps,” a slightly smaller version of the pattern above, made of thefabrichut.com “fat fifths.” Part of “Glad Bundle” #CC 3000

Glad Jacket (made from sweatshirt) #CC 2202

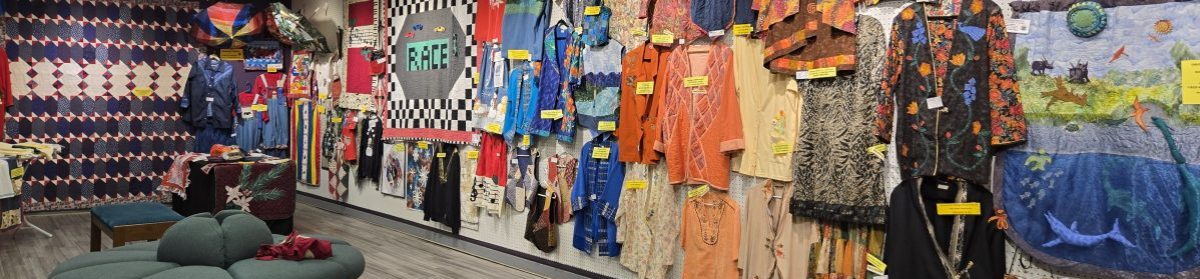
Here’s the ringer!!! The TIRES of these race cars are yoyos. I added a button on top!

Fast Track, single bed quilt #CC 2312

Yoyos are sewn by hand, but the fun part is that they are so small that they’re easy to carry with you to meetings, doctor appointments, ballgames, etc. Also, you can make them from scraps. I LOVE using up the scraps, don’t you?

Thanks for checking out my guest blog! If there’s a place to leave a comment, I appreciate a kind word.–Libby

Kudos to the government

workers and leaders for trying their best, from local to state to national level, to attack this daggone plague and keep us safe. Yes, we all gripe and we all think we know better than the government, and yes, we never agree with everything, but I have to give them an A for effort. How do you defeat an invisible enemy about which you know so little? Thank you so much for trying!

“County Courthouse Platter Pad ” cc2016 by LJ Christensen

This is my little tribute above, a “County Courthouse” appliqueed platter pad, 12″ of cushy comfort, guaranteed not to have a virus. Who wants a courthouse hot pad? How about someone who works in local or state government? CLICK HERE for more info. One reason I designed it is that I eventually want to make an “Our Town” quilt using my “Little Red Schoolhouse” CLICK HERE for school pattern:

“Little Red Schoolhouse” cc 2005 by LJ Christensen

and here’s my “Charming Chapel” CLICK HERE for church:

“Charming Chapel” cc2002 by LJ Christensen

The designs are all simple to applique; eventually I’ll have houses and maybe a gas station and grocery store. This is an on-going project. In honor of my idea, I’ve put all of them on sale for just $1.50 each through May 24. Instead of going out to school or church, have fun building YOUR town at home!

Here’s a challenge!

This week I didn’t do a new “pattern” because I was working on a patternless subject, a self-portrait! However, I’ll share it because it was loads of fun. For those who don’t sew–friends, family, children–it could be done with construction paper (scrapbook paper maybe) and glue, even paint, but for the savvy seamstress with lots of fabric stash, scraps and fusible web, well, it’s a cinch to cut and fuse the whole thing. I DID use a needle and thread for the beads, craft eyelashes and the borders, but that’s it. Tips follow. (Notice I decided to do Right Brain-creative, Left Brain-logical, to explore both side of my personality. That’s just an added twist.)

“Self-Portrait: Right Brain, Left Brain”

Because there is no new pattern, I’m putting SEVERAL hot pad appliques on sale until my birthday in late August. Can you find them? Click here.

Now for my tips:

  1. Start with a pencil sketch on paper of an oval (circle for MY round face) and general placement of features. Don’t worry; you have an eraser, and this doesn’t have to be realistic. (However, a photo or mirror may help.)
  2. Use the sketch as a “pattern” to cut head and neck out of some “face” fabric. It can be realistic (on right above) or funky (left was actually an ombre, and I placed the darker part as the neck shadows. The eye on the left is dark purple!)
  3. I fused the head to background fabric. On the right (left brain) I did some straight piecing of quiet fabric then the left (right brain), I collaged onto plain fabric.
  4. When working on the eyes and mouth, I found it important to place some hair to get the proportions right. (Try to DE-emphasize the nose, and just use a subtle coloring difference or little shadows underneath. You don’t want to look like Cyrano de Bergerac!)
  5. About fusing–always fuse the paper onto a section of fabric first, cut out shape, then tear off the paper. (This ensures that the glue will get to the edges–NOTE, use a pin to score the paper for an easy release. )
  6. Pin first, a lot, before fusing.
  7. Work on details and background, using fun fabrics, and don’t be afraid to add 3D notions like my curly ribbons and beads–just raid your stash for ideas. (After walking away for a while, I returned to add eye glints and wrinkles [I mean “laugh lines”], plus a few extra shadows.)
  8. Use fusible fleece to back, or quilt with regular backing if you want. I like adding 2 borders, but I just turned this hanging like a pillowcase instead of quilting and binding. (Your portrait, your rules!)

HAVE FUN!!! This would be a great guild challenge, wouldn’t it? I’d make the challenge in Sept and let everyone try to match portrait with quilter in December to see who gets the most correct. What a hoot! Send me pics to post!! I did MINE for an art challenge because I was supposed to do a portrait–oh my! At least the fabric is more forgiving. HA!